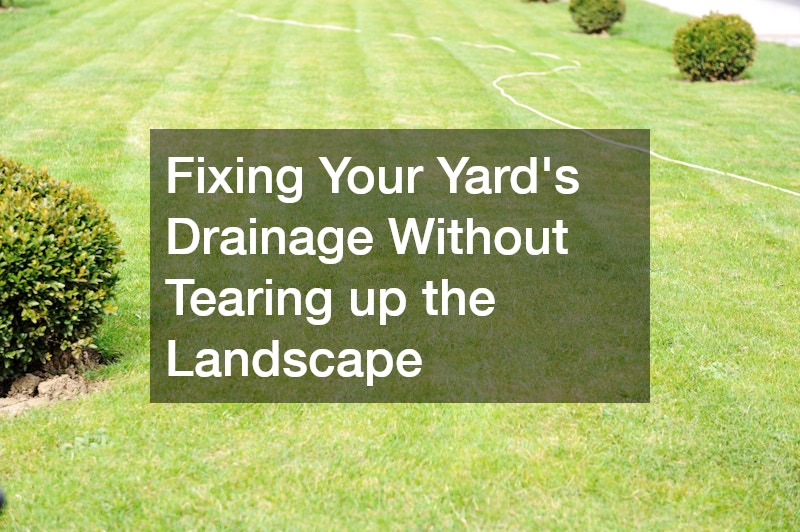
Standing water, soggy patches, and mysterious puddles that linger for days after a storm are more than just an eyesore. They can undermine your foundation, kill off landscaping you have spent years cultivating, and turn your backyard into a breeding ground for pests. The good news is that fixing a drainage problem does not have to mean bulldozing your lawn, ripping out mature trees, or starting your landscape from scratch. With the right combination of targeted repairs and smart maintenance, you can solve water problems while keeping the yard you already love intact.
Identify Where the Water Is Actually Coming From

Before you dig, dig for information first. Most yard drainage issues trace back to one of a handful of causes: poor grading, a high water table, clogged gutters dumping water in one spot, or an aging underground pipe that has started to collapse or fill with roots. Walking your property during and right after a heavy rain will show you exactly where water pools, where it flows, and where it refuses to go anywhere at all.
Taking notes and even photos over a few storms gives you a real pattern to work with instead of guesswork. This is also the point where many homeowners bring in a professional for a broader property evaluation, since a trained eye can catch issues that are not obvious to someone walking the yard for the first time.
- Watch for water pooling near the foundation within 10 feet of the house
- Note any spots where grass struggles to grow due to constant saturation
- Check downspouts to see where they discharge and how far the water travels
- Look for soft, spongy ground that never fully dries between rains
Consider a Full Home Evaluation Before You Dig
If you are unsure whether your drainage problem is cosmetic or structural, a home inspection focused on moisture and grading can save you from expensive guesswork. Inspectors who specialize in drainage and moisture intrusion can identify whether water is simply pooling on the surface or actually seeping into your crawlspace or basement walls. This distinction matters enormously, because surface fixes will not solve a foundation-level moisture problem, and vice versa.
A thorough evaluation typically includes checking the slope of the yard, the condition of the gutters and downspouts, and any visible cracks or efflorescence on foundation walls. Getting this information upfront means any work you eventually do addresses the actual cause rather than just the symptoms you can see from the porch.
Repair Aging Pipes Without Excavating Your Yard

One of the biggest fears homeowners have is that fixing a broken drain pipe means trenching across the entire lawn, destroying flower beds, walkways, and mature trees in the process. A cracked or collapsed pipe running beneath a driveway or patio has traditionally meant tearing up that hardscaping entirely, at significant expense and inconvenience. Fortunately, trenchless no dig pipe lining technology has made this kind of destruction largely unnecessary. This method involves inserting a flexible liner coated in resin into the existing damaged pipe, then curing it in place to form a smooth, durable new pipe within the old one. Access is typically gained through a single small entry point, sometimes just an existing cleanout or a small access hole, rather than a continuous trench. The cured-in-place liner can address common problems like root intrusion, minor offset joints, and hairline cracks, and the resulting pipe often has a smoother interior surface than the original, which can actually improve flow. Most residential jobs are completed in a single day, with the resin curing in a matter of hours depending on pipe diameter and length. It’s worth noting that trenchless lining works best on pipes with moderate damage rather than pipes that have completely collapsed or shifted out of alignment, so a camera inspection beforehand is essential to confirm it’s the right fix. For severely damaged sections, a plumber may recommend pipe bursting instead, which still avoids open trenching while replacing the pipe entirely.
This approach works especially well for older clay or cast iron drain lines that have cracked, shifted, or been infiltrated by tree roots. Trenchless methods like pipe bursting and cured-in-place pipe (CIPP) lining accomplish the repair through one or two small access points rather than a continuous trench dug along the pipe’s entire path. In pipe bursting, a new pipe is pulled through the old one while a bursting head fractures the original material outward. With CIPP lining, a resin-saturated liner is inserted and cured in place, essentially creating a new pipe within the old one’s shell. Because the repair happens from access points rather than a continuous trench, your landscaping, driveway, and hardscaping stay largely undisturbed. A typical job might require only two 3-by-3-foot excavation pits instead of a 50-foot trench, which means mature trees, retaining walls, and paver patios can often stay exactly where they are. Most residential trenchless repairs are completed in a single day, versus several days for open trenching plus additional time for landscape restoration. It is a more expensive option upfront than traditional digging in some cases, with trenchless repairs often running 10-20% higher per linear foot depending on pipe diameter and access difficulty. However, the savings on landscape restoration often even things out, since sod replacement, tree removal, or re-pouring concrete can quickly erase any savings from a cheaper dig-and-replace job. Before committing, ask your contractor for a camera inspection of the pipe first, since severe pipe collapse or extreme misalignment may still require limited excavation even with trenchless methods.
- Works on pipes with cracks, offset joints, or minor collapses, using pipe lining or pipe bursting techniques instead of full replacement
- Typically requires only one or two small access points, often just 2-3 feet wide, dug at the pipe’s entry and exit points
- Can extend the life of an old pipe system by decades, with some epoxy liners rated for 50 years of use
- Best suited for pipes that still have their original shape and diameter mostly intact, since severely crushed or misaligned sections may need traditional excavation
- Costs vary by method and pipe length, but trenchless repair often runs comparable to or less than full-yard excavation once landscaping restoration is factored in
- A camera inspection beforehand helps determine whether your pipe qualifies for a trenchless fix or needs more invasive repair
Regrade Problem Areas With Minimal Disruption
Not every drainage fix requires heavy equipment or a full landscape overhaul. In many cases, small adjustments to the grade around your home, patio, or low spots in the yard can redirect water without disturbing established plants, trees, or hardscaping. The key is working with the existing contours rather than reshaping the whole yard. A general rule of thumb is to maintain a slope of about 2% away from your foundation, which translates to roughly a 6-inch drop over the first 10 feet. Adding a few inches of topsoil or a soil-and-compost blend to strategic low areas, then gently tapering it away from the house, is often enough to stop water from pooling where it shouldn’t. Focus first on the areas within 5 to 10 feet of your foundation, since that’s where standing water causes the most damage. For isolated low spots farther out in the lawn, spot-filling with topsoil and reseeding or laying sod on top can eliminate small depressions without excavating the surrounding area. A garden rake, a hand tamper, and a level or string line are usually all the tools needed for these smaller jobs. Just be careful not to bury tree trunks, shrub root flares, or raise soil against siding, since trapped moisture there can invite rot or pests. If you’re unsure whether the slope is adequate, a simple test is to run a hose in the suspect area for 15–20 minutes and watch where the water travels. This lets you fine-tune the grade in small increments, adding soil only where needed rather than committing to a larger, more disruptive regrading project.
For larger low spots that hold water across the whole yard, a dry creek bed or shallow swale can redirect that water toward a storm drain, street, or rain garden without requiring heavy equipment or a full excavation. A swale is simply a gently sloped channel, typically graded at a 2 to 4 percent drop, that guides water along the path of least resistance. A dry creek bed does the same job but is lined with river rock, cobbles, and a few larger boulders, so it reads as an intentional design element rather than a drainage fix. Both approaches work with hand tools and a weekend’s worth of digging in most cases, since you are only removing a few inches of soil rather than trenching deep pipe. Adding landscape fabric beneath the rock helps suppress weeds and keeps the stones from sinking into the mud over time. Planting moisture-tolerant species like sedges, ferns, or Siberian iris along the edges softens the look further and helps absorb excess water between storms. These solutions blend into the yard rather than looking like construction projects, which matters if you have spent years building a landscape you are proud of. A well-placed dry creek bed can even become a focal point, especially if you tie it into an existing rain garden or low-lying planting bed at its endpoint.
- Use topsoil blends with some clay or loam content so they compact well but still let water percolate through rather than pooling
- Aim for a slope of about 2 percent away from structures — roughly a 2-inch drop for every 8 feet — enough to move water without creating a noticeable grade change
- Feather new soil into existing grade over several feet to avoid an abrupt ridge or visible patch job
- Incorporate river rock or stone to slow water flow in a swale, using larger cobbles at the inlet and smaller gravel downstream to dissipate energy
- Avoid burying existing root systems too deeply when regrading; more than 2-3 inches of new soil over mature roots can stress or suffocate trees and shrubs
- Work around root flares and irrigation lines by hand-grading in those zones instead of using heavy equipment
- Check results after a heavy rain and adjust low spots with additional soil rather than re-grading the entire area
Protect Existing Plants and Trees During Drainage Work
Homeowners often assume that any drainage repair will mean sacrificing their landscaping, but that is rarely the full picture. Local plant nurseries can be a valuable resource here, not just for buying new plants but for advice on which existing shrubs and trees can tolerate temporary root disturbance and which cannot. Many nurseries have staff familiar with regional soil conditions who can recommend water-tolerant species for areas that stay damp no matter what you do.
If a drainage solution does require removing a plant temporarily, it is often possible to relocate it rather than discard it. Keeping root balls moist and shaded during the move, then replanting promptly once the work is finished, gives most established plants a strong chance of survival.
- Ask about moisture-loving plants for naturally soggy areas
- Consider native grasses for the edges of a dry creek bed or swale
- Have new plants ready to install as soon as grading work wraps up
Address Standing Water Before It Becomes a Pest Problem
Poor drainage does not just threaten your lawn and foundation, it also creates ideal breeding conditions for mosquitoes and other pests. Standing water can produce a new generation of mosquitoes in as little as seven to ten days, which means a drainage problem you have been putting off can quickly turn into a much bigger nuisance. Combining your drainage fixes with a mosquito and tick control program gives you protection on two fronts while the yard dries out and stabilizes.
Even after grading and pipe repairs are complete, it is worth keeping an eye on any decorative water features, low spots, or gutters that could still collect small pools. Regular treatment schedules, especially through the warmer months, help keep pest populations down while your landscape recovers from any work that was done.
- Empty or treat any containers that collect rainwater
- Keep grass trimmed short in damp areas to reduce tick habitat
- Schedule treatments seasonally rather than only after noticing a problem
Know When to Call in Professional Drainage Specialists

Some drainage issues are simple enough to handle with a shovel and a weekend, but others involve underground utilities, structural grading, or municipal storm systems that are best left to professionals. Reputable drainage companies can run a camera through existing pipes, test soil percolation rates, and design a system of French drains, catch basins, or dry wells tailored to your specific yard. This kind of assessment is difficult to replicate with DIY research alone, especially on properties with complicated slopes or clay-heavy soil.
When comparing companies, ask specifically about their experience with no-dig or minimally invasive methods, since not every contractor offers these options. A company that only proposes full excavation may simply not have the specialized equipment for trenchless work, even if a less invasive option would work just as well for your situation.
- Ask for references from jobs with similar soil and slope conditions
- Request a written explanation of why a particular method was recommended
- Confirm whether permits are needed for the proposed drainage work
Extend Drainage Planning to Covered Outdoor Living Spaces
If you are investing in a drainage overhaul, it is worth thinking beyond the open lawn to any covered structures you have or plan to add. Homeowners who are considering 3 and 4 season porches should factor drainage into the design from the start, since water pooling near the porch foundation can undermine the structure over time. A well-planned gutter and downspout system tied into your broader yard drainage plan prevents this addition from becoming its own future headache.
This is also a good time to think about how water moves around any patios, decks, or outdoor kitchens you might be planning. Coordinating these projects with your drainage work, rather than treating them as separate decisions, saves money and prevents having to redo grading later.
- Slope porch and patio surfaces away from the home
- Include gutters on any new roofed structure, even a small porch addition
- Plan downspout routing before pouring any concrete footings
Deal With Water Damage Inside the Home if It Has Already Occurred
If drainage problems have been ignored for a while, water may have already found its way indoors, whether through a leaking basement, a damaged crawlspace, or flooring that has absorbed moisture over time. Hardwood installation sanding refinishing work is often necessary after water exposure has caused boards to cup, warp, or discolor, and addressing the drainage issue first prevents the same damage from happening again after the floors are repaired. Trying to refinish floors before fixing the underlying moisture source is a common and costly mistake.
In more serious cases, such as a storm that has caused broken windows or doors alongside flooding, an emergency board up service may be needed to secure the home while repairs are arranged. Addressing both the immediate protection of the home and the long-term drainage fix ensures you are not just patching symptoms while the root cause remains.
- Let affected areas dry completely before starting any flooring repair
- Check for mold growth in walls or subfloor before refinishing
- Document water damage with photos for insurance purposes
Plan Ahead for Other Yard Upgrades Once Drainage Is Fixed
Once your yard is properly draining, it opens the door to other improvements that would have been risky or impractical on soggy ground. Many homeowners use this as an opportunity to finally install an EV home charger near the driveway, since the underground electrical conduit work can be coordinated with any remaining yard disturbance rather than requiring a separate dig later. Planning multiple underground projects together, when possible, reduces the number of times your lawn gets disrupted overall.
This is also a smart time to think about custom framing for any outdoor structures you have been putting off, such as a pergola, shed, or fence, since a stable, well-draining base is essential for those structures to last. Building on ground that still has drainage issues often leads to shifting, rot, or foundation problems within just a few years.
- Coordinate electrical conduit trenching with any remaining drainage work
- Confirm soil compaction is adequate before building on regraded areas
- Get quotes for structural additions after drainage issues are fully resolved
Fixing your yard’s drainage does not have to come at the cost of the landscape you have worked hard to build. By identifying the real source of the problem, choosing minimally invasive repair methods where possible, and looping in specialists only where their expertise truly matters, you can solve standing water issues while keeping your trees, gardens, and outdoor living spaces intact. Start with a careful assessment of where and when water collects, then tackle the underlying cause rather than just the visible puddles. A dry, healthy yard is achievable without a bulldozer, and the sooner you start, the sooner you can stop dreading the next heavy rain.