
That stack of weathered boards from an old barn, a torn-down deck, or a construction site dumpster holds more potential than most homeowners realize. With a little planning, salvaged wood can become storage pieces that look custom-built and hold up to daily use for years. This guide walks through practical ways to turn reclaimed lumber into functional storage throughout your home, plus the considerations that separate a piece you will love from one that falls apart in a season.
Sourcing Reclaimed Lumber for Your Project
Before you start building, you need a reliable source of wood that is structurally sound and free of hidden problems. Old barns, demolished houses, shipping pallets, and even discarded furniture can yield beautiful lumber, but not every board is worth hauling home. Check for rot, insect damage, and excessive warping before committing time to a piece. Many salvage yards and architectural reclamation centers sort wood by species and condition, which makes shopping easier than combing through a random job site.
Timing matters too. Demolition and renovation projects often generate usable scrap wood that would otherwise end up in a landfill, so building relationships with local contractors can pay off. Roofers replacing old fascia boards or removing wood decking sometimes set aside lumber that is perfectly fine for indoor storage projects, and asking politely before a job wraps up can net you free materials.
- Ask contractors and demolition crews if you can take leftover or removed wood
- Inspect for cracks, soft spots, and insect holes before purchasing or hauling
- Look for wood with interesting grain, nail holes, or patina for character
- Confirm the wood has been dried properly to avoid future warping
- Avoid wood treated with lead paint or unknown chemical coatings
Preparing Salvaged Boards Before You Build
Reclaimed wood almost always needs cleaning and prepping before it becomes furniture. Old nails, staples, and screws hide inside boards and can destroy saw blades or injure you during cutting, so a thorough inspection with a metal detector or strong magnet is worth the extra time. Sanding removes decades of grime while revealing the grain underneath, and a light pass is often enough to preserve the weathered character that makes salvaged wood appealing in the first place.
Moisture content deserves attention as well, especially if the wood came from an outdoor structure. Storing boards indoors for several weeks allows them to acclimate to your home’s humidity levels before you cut and assemble anything. Skipping this step often leads to gaps, cracks, or warped joints months after a project looks finished.
Building Custom Garage Shelving and Cabinets

The garage is one of the easiest places to put salvaged wood to work because the space rewards sturdy, no-frills construction over polished finishes. Open shelving built from thick reclaimed planks can hold paint cans, tools, and seasonal decorations without the cost of buying new lumber or premade units. Because garages often lack climate control, salvaged wood that has already weathered outdoor conditions tends to hold up better than fresh, kiln-dried boards that were never exposed to temperature swings.
Many homeowners find that a thoughtful garage storage system built from reclaimed materials outperforms flimsy plastic shelving units sold at big box stores. Adding simple brackets, cleats, or a ladder-style frame gives salvaged boards the support they need to carry real weight. This approach also frees up floor space for parking, lawn equipment, or a workbench.
- Use thicker boards, at least three quarters of an inch, for shelves carrying heavy items
- Anchor shelving directly into wall studs rather than drywall alone
- Leave a small gap between boards for airflow if humidity is a concern
- Add a coat of sealant if the garage experiences moisture or temperature swings
Turning Pallet Wood Into Mudroom Storage
Mudrooms take a beating from shoes, backpacks, and outdoor gear, which makes them a great spot for rugged salvaged wood builds. Disassembled pallets can become cubbies, boot trays, or a bench with built-in shoe storage underneath. Because pallet boards are typically narrow, they work well for smaller storage pieces where large slabs would feel out of place.
Adding hooks salvaged from old cabinet hardware or barn door fittings gives the piece extra function without looking mismatched. A coat of clear finish protects the wood from mud and moisture while still showing off the original texture and nail holes. This kind of build costs very little but adds noticeable organization to a space that often becomes a household dumping ground.
Repurposing Old Wood for Kitchen and Pantry Storage

Kitchens benefit from open shelving, spice racks, and pantry organizers built from reclaimed wood because the material adds warmth next to modern appliances and countertops. A floating shelf made from a reclaimed beam can display dishware while tying together the room’s overall look, especially in kitchens that already feature natural stone finishes. Homeowners who invested in granite countertops often find that the contrast between polished stone and rustic wood shelving creates a balanced, layered aesthetic rather than a mismatched one.
Pantry storage is another natural fit, since salvaged boards can be cut into narrow shelves that maximize a small closet or nook. Sanding these pieces smooth is more important here than in a garage, since food containers and glass jars need a stable, splinter-free surface. Sealing the wood with a food-safe finish keeps it durable against spills and everyday handling.
Crafting a Reclaimed Wood Home Office Storage Solution

Home offices need storage that stays organized without feeling sterile, and reclaimed wood offers a middle ground between industrial metal shelving and mass-produced office furniture. A simple wood file cabinet or bookshelf built from salvaged boards can match a desk while providing a place for documents, supplies, and electronics. Because reclaimed wood pieces often have unique grain patterns, no two builds ever look quite the same, which appeals to people who want their workspace to feel personal.
For those who already own factory-made office furniture, a salvaged wood accent piece like a credenza or open bookcase can soften the look of an otherwise uniform setup. Mixing materials this way also tends to be more budget-friendly than replacing an entire room’s furniture set. A single well-built storage piece can shift the whole feel of a home office from generic to intentional.
Weatherproofing Salvaged Wood Storage for Outdoor Use
Outdoor storage benches, sheds, and planter boxes built from salvaged wood need extra protection since they face sun, rain, and temperature swings year-round. Before sealing anything, inspect the wood for existing rot, insect damage, or old paint that may contain lead, especially if the salvage came from a pre-1978 structure. A stiff brush and mild wood cleaner will remove grime and open the grain so new sealant actually penetrates rather than sitting on the surface. A quality exterior sealant or marine-grade varnish helps slow down moisture absorption and UV damage, but it needs to be reapplied every year or two depending on your climate. In humid or coastal regions, look for products rated for constant moisture exposure, like spar varnish, which stays flexible enough to handle wood’s natural expansion and contraction. For pieces that will hold soil or plants, choose a food-safe or low-VOC sealant, since standard exterior finishes can leach chemicals into garden beds over time. Elevating outdoor pieces off the ground with small feet, casters, or a gravel base also prevents wood rot by keeping boards away from standing water. Even an inch or two of clearance makes a meaningful difference, since ground moisture wicks upward through direct wood-to-soil contact far faster than most people expect. Adding a metal or rubber barrier between the wood and any feet, along with a slight slope in the design to help water run off, further extends the life of the piece.
Before sealing and finishing your salvaged wood piece, consider where it will actually sit outdoors. Choose a spot with at least a few inches of clearance from the ground, using gravel, pavers, or a raised base to prevent moisture from wicking up into the wood. Even the best weatherproofing sealant can’t compensate for a piece that’s sitting directly in standing water after every rainstorm. Homeowners building larger structures, like a salvaged wood shed or storage bench that will sit under a roof overhang, should also think about drainage around the area. Poor grading near a structure can direct water toward the foundation of your home, which is a job better suited to landscaping contractors who understand how to redirect runoff safely, much like crews who rely on pavement marking to guide drainage patterns and traffic flow around larger properties. A grade sloping away from the structure at roughly a 2% pitch, about a quarter inch per foot, is generally enough to keep water moving away rather than pooling. It’s also worth checking how gutters and downspouts interact with your storage area, since a downspout emptying just a few feet from a salvaged wood shed can undo months of careful sealing in a single season. Extending downspouts or adding a splash block can redirect that volume of water somewhere less damaging. Getting the site work right protects both your new storage piece and the surrounding yard from long-term water damage.
Matching Salvaged Wood Storage With Home Systems and Finishes
A storage piece does not exist in isolation, and thinking about how it fits with the rest of your home’s systems and finishes helps avoid awkward clashes later. Before you settle on a piece, walk through the room where it will live and note the undertones already present in the flooring, trim, and cabinetry. Warm, honey-toned salvaged oak can look out of place beside cool gray floors, while weathered barnwood grays tend to blend more naturally with modern, neutral palettes. If you are planning a larger renovation that includes new flooring, such as composite metal decking on a porch or outdoor living area, choosing a wood tone and finish that complements those materials keeps the overall look cohesive. Composite metal decking often comes in muted charcoal, driftwood, or walnut tones, so pulling your salvaged wood’s stain toward one of those shades helps the indoor and outdoor spaces feel like part of the same design rather than two competing projects. This is especially worth considering if the storage piece sits near a doorway or transition zone where both materials are visible at once. Small details like hardware finish and stain color make a bigger difference than most people expect. Matte black or aged brass pulls tend to read as intentional against reclaimed wood, while shiny chrome can feel jarringly modern by comparison. It also helps to bring home a paint chip, flooring sample, or even a photo of your decking when shopping so you can compare undertones in natural light rather than relying on memory. A little planning here prevents the frustration of building or buying a beautiful piece that quietly fights with everything around it.
It also helps to think ahead about placement near mechanical systems in your home. Storage built too close to a water heater, for instance, can create access problems down the road if you ever need water heater repair, since technicians need clearance to service the unit safely, check the pressure relief valve, or replace the anode rod. Most manufacturers recommend at least 18 to 24 inches of open space in front of a water heater, with similar clearance around electrical panels, furnaces, and HVAC equipment. The same logic applies to sump pumps, gas shutoff valves, and irrigation controls, which all need to stay visible and reachable in an emergency. Before you finalize a design, walk the space and note where a technician would need to stand, kneel, or swing open an access panel. If you’re unsure of local requirements, a quick call to your utility provider or a licensed plumber can confirm safe clearances for your specific setup. Leaving a few feet of open space around appliances and utility equipment when positioning new shelving prevents headaches later. It also protects your salvaged wood investment, since cramped installations are more likely to get bumped, scratched, or removed altogether when repairs become necessary.
- Leave at least 24 to 30 inches of clearance around water heaters and furnaces, and check local code, since many jurisdictions require 36 inches for service access
- Match wood stain to nearby flooring or trim for a cohesive look, or pull a complementary tone from countertops or cabinetry if the storage sits near a kitchen or bath
- Avoid blocking electrical panels or shutoff valves with built-in storage; panels typically need 30 inches of clear width and 36 inches of depth by code
- Consider how new storage will affect airflow in utility closets, especially around furnace intake vents and dryer exhaust lines
- Skip solid backs or doors on shelving near appliances that generate heat, and use louvered or gapped designs instead to keep air circulating
- Double-check that salvaged wood placed near heat sources is fully dry and free of residual finishes that could off-gas when warmed
Maintaining Indoor Air Quality Around Wood Storage Projects
Sanding and finishing reclaimed wood indoors can stir up dust, mold spores, and old finish particles that linger in your home’s air long after the sawdust settles. Working in a well-ventilated space or outdoors whenever possible reduces how much of this debris makes its way into your HVAC system. If you notice persistent dust or a musty smell after a big salvage project, it may be worth having your ductwork inspected.
Some homeowners choose to schedule a cleaning with one of the local air duct cleaning companies after a large indoor woodworking project, particularly if anyone in the household has allergies or respiratory sensitivities. This is especially relevant if the reclaimed wood came from an older structure that may have carried mold spores or fine particulate matter. A clean air system helps protect both your health and the finished wood pieces from ongoing dust buildup.
Insulating and Protecting Wood Storage in Unfinished Spaces
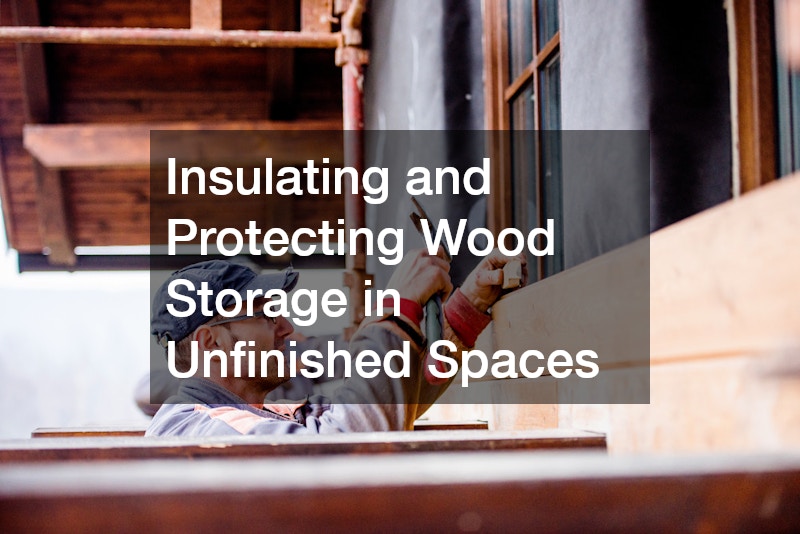
Basements, attics, and garages are popular spots for salvaged wood storage builds, but these areas often have inconsistent temperatures and humidity that can shorten the lifespan of wood furniture. Wide temperature swings cause wood to expand and contract repeatedly, which eventually leads to loose joints or cracked panels. Improving insulation in these spaces protects not just your storage pieces but everything else stored nearby, from holiday decorations to important documents.
Homeowners tackling a full basement or attic renovation sometimes bring in an insulation business to address drafts and moisture before finishing the space with built-in shelving or cabinetry. Addressing insulation first, rather than after installing custom storage, makes the work easier and prevents having to remove finished pieces later. A properly insulated space also reduces the risk of condensation forming on wood surfaces, which can lead to mold or warping over time.
Salvaged wood storage projects reward patience, but the payoff is furniture with genuine character that mass-produced pieces simply cannot match. Start small with a single shelf or bench, learn how the material behaves, and expand into larger builds as your confidence grows. Whether you are organizing a garage, mudroom, or home office, the right reclaimed wood project can solve real storage problems while adding warmth and history to your home.