
Discovering structural damage in your home can feel overwhelming, especially when you start picturing dumpsters full of debris piled at the curb. The good news is that fixing cracked foundations, sagging floors, damaged roofs, and worn-out systems does not have to mean mountains of landfill waste. With thoughtful planning, smart material choices, and the right professionals, you can restore your home’s integrity while keeping your environmental footprint small. This guide walks through the most common structural repair scenarios and how to approach each one responsibly.
Diagnosing Foundation Cracks Before You Start Demolition
Not every crack in a foundation wall signals a catastrophic problem, and tearing into concrete before you understand the cause often leads to unnecessary waste. A qualified inspector can distinguish between cosmetic shrinkage cracks and cracks that indicate settling, water intrusion, or soil movement. Getting this diagnosis right the first time means you only remove the material that actually needs to go, rather than demolishing more than necessary out of caution.
Many foundation issues can be addressed through targeted masonry repair rather than full wall replacement. Injecting epoxy or polyurethane into cracks, repointing mortar joints, and patching spalled concrete sections all preserve the majority of the original structure. This selective approach saves materials, reduces landfill contributions, and typically costs less than a complete rebuild.
- Hire a structural engineer for cracks wider than a quarter inch
- Watch for horizontal cracking, which often signals more serious pressure issues
- Photograph and measure cracks monthly to track movement over time
- Ask contractors whether patching is a viable alternative to demolition
Restoring Damaged Basement and Garage Floors
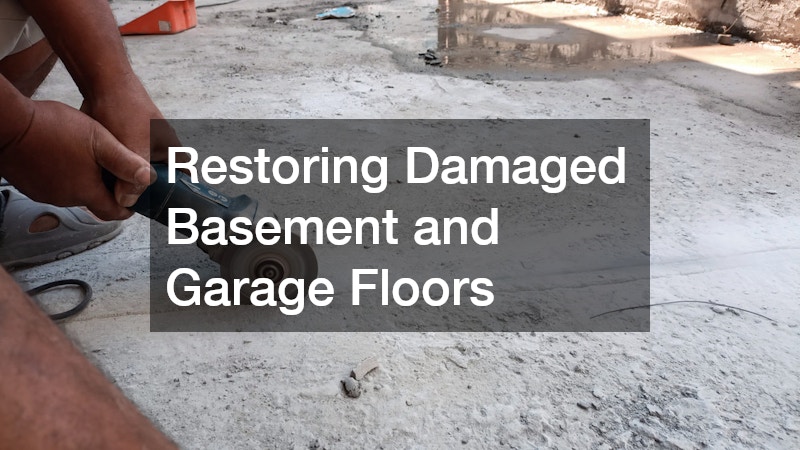
When a concrete slab has surface damage, pitting, or minor cracking, full replacement is rarely the only option. Concrete floor coatings can seal, strengthen, and beautify an existing slab without requiring you to break it up and haul it away. Epoxy and polyaspartic coatings bond directly to properly prepared concrete, extending the life of the floor while covering imperfections.
This approach is particularly useful in basements and garages where the underlying slab is structurally sound but cosmetically worn or slightly damaged from moisture exposure. Instead of generating debris from demolition, you are adding a protective layer that resists future cracking, staining, and water damage. It is a practical middle ground between doing nothing and undertaking a full slab replacement.
- Test for moisture issues before applying any coating
- Choose coatings rated for the specific traffic and use of the space
- Repair minor cracks and pits before coating application
- Consider slip-resistant additives for garages and workshops
Repairing Roof Framing and Sheathing After Storm Damage
Storms and long-term wear can compromise roof trusses, rafters, and sheathing, but that does not always mean the entire roof structure needs replacing. Experienced roofing companies can often assess which sections of framing are salvageable and reinforce them with sistering techniques rather than tearing out large sections. This targeted repair strategy keeps usable lumber and materials out of the dumpster.
When shingles or underlayment do need replacing, ask whether old materials can be recycled locally, since many regions now have facilities that repurpose asphalt shingles into paving material. Reusing sound decking boards wherever structurally appropriate also reduces the volume of new lumber required. A little extra planning during the estimate phase can significantly cut the waste generated by a roof repair project.
- Request a detailed damage assessment before approving a full tear-off
- Ask about shingle recycling programs in your area
- Save reusable flashing and vents when possible
- Confirm framing repairs meet current local building codes
Reinforcing Sagging Floor Joists Without Full Replacement
A bouncy or sagging floor often points to weakened joists, but complete floor replacement is usually overkill. Sistering new lumber alongside damaged joists, installing additional support beams, or adding jack posts can restore stability while keeping the original floor system mostly intact. This method preserves flooring materials above and reduces the amount of framing lumber that ends up discarded.
Proper diagnosis matters here too, since moisture damage, pest infestation, and simple age-related sag each call for different solutions. A contractor who understands the root cause can recommend the least invasive fix that still meets safety standards. Taking this measured approach avoids ripping out flooring, subflooring, and joists unnecessarily.
- Identify whether sag is caused by moisture, pests, or undersized lumber
- Ask about sistering versus full joist replacement costs
- Check for adequate support spacing after repairs
- Address the underlying cause to prevent recurring damage
Coordinating Whole Home Repairs With Experienced Renovation Teams
Larger structural projects that touch multiple systems, such as wall reframing combined with plumbing or electrical adjustments, benefit from centralized coordination. Working with established remodeling contractors who plan material orders carefully can prevent the overbuying that leads to excess scrap lumber, drywall, and packaging waste. Good contractors will also salvage and donate reusable materials like doors, trim, and fixtures instead of sending them to the landfill.
Ask potential contractors directly about their waste management practices before signing a contract, since this varies widely between companies. Some will separate recyclable materials on site, while others simply haul everything to a single dumpster regardless of what it contains. Choosing a team that prioritizes sorting and reuse can make a measurable difference in your project’s environmental impact.
- Request a written material and waste plan before work begins
- Ask whether unused materials can be returned to suppliers
- Confirm if the company partners with donation centers for usable materials
- Get a clear timeline to avoid rush orders that create excess packaging waste
Addressing Water Damage From Clogged or Failing Drain Lines
Structural damage frequently traces back to water problems, and a slow or blocked drain line can quietly rot framing, subfloor, and drywall for months before it is noticed. Calling a drain cleaning company at the first sign of slow drainage or recurring backups can prevent the kind of prolonged moisture exposure that leads to major structural repairs later. Hydro-jetting and camera inspections are far less invasive than the demolition required once rot has set in.
Preventing water damage in the first place is one of the most effective ways to avoid generating renovation waste down the line. A properly maintained drain system reduces the odds you will ever need to replace flooring, cabinetry, or framing due to hidden leaks. Regular maintenance is a small investment compared to the material waste created by a full water damage repair.
- Schedule annual drain inspections in older homes
- Watch for gurgling sounds or slow drainage as early warning signs
- Avoid chemical drain cleaners that can damage pipes over time
- Address tree root intrusion promptly to prevent recurring clogs
Managing Heating System Failures That Cause Hidden Damage
A malfunctioning furnace or boiler can cause more than just discomfort; leaking components, condensation buildup, and even minor combustion issues can lead to moisture damage in surrounding framing and drywall over time. Prompt heating repair addresses the mechanical problem before it escalates into a structural one, saving you from the material waste of a larger renovation. Technicians can often repair a failing component rather than replacing an entire unit, which also reduces the amount of old equipment sent to scrap.
Keeping heating equipment well-maintained extends its lifespan and reduces the frequency of emergency repairs that tend to generate rushed, wasteful decisions. Homeowners who schedule regular tune-ups typically catch small issues, like a cracked heat exchanger or failing seal, before they cause secondary damage. This proactive mindset applies to structural preservation just as much as it does to comfort and efficiency.
- Schedule seasonal maintenance checks each fall
- Watch for unusual condensation or moisture near heating equipment
- Replace worn seals and gaskets promptly rather than waiting for failure
- Ask technicians about repairable versus replaceable components
Trimming Trees to Protect Roofs and Foundations From Damage

Overhanging branches and invasive root systems are two of the most overlooked contributors to structural damage. Falling limbs can crack roof sheathing and gutters, while aggressive roots can shift foundations and infiltrate drain lines. Hiring tree trimming services on a regular schedule reduces these risks and can prevent the kind of sudden damage that requires emergency structural repair.
Preventive tree care is a low-waste strategy because it stops problems before they require material-intensive fixes. Trimming back branches near rooflines and monitoring root growth near foundations costs far less, in both money and materials, than repairing storm damage after the fact. Many arborists can also identify weak or diseased limbs likely to fail before the next major storm.
- Trim branches at least six feet away from rooflines
- Monitor large trees near foundations for root heaving
- Remove dead or weak limbs before storm season
- Consult an arborist if roots appear near underground pipes
Salvaging and Upgrading Cabinetry During Structural Repairs
When structural work affects a kitchen or bathroom wall, cabinetry often gets removed and discarded even when the boxes themselves are still sound. In many cases, only the doors and hardware need updating, which means ordering custom cabinet doors to fit existing cabinet frames rather than replacing entire units. This approach preserves usable materials while still giving the space a refreshed look after repairs are complete.
This strategy works particularly well when structural repairs require temporary removal of cabinetry to access wiring, plumbing, or framing behind the wall. Once the cabinets are already out, it is a convenient time to reface or replace just the doors rather than the whole unit. Homeowners save money and materials while still ending up with a finished, updated look.
- Measure existing cabinet frames carefully before ordering replacement doors
- Ask about matching finishes if only part of the kitchen needs new doors
- Reuse hinges and hardware when they are still in good condition
- Consider soft-close upgrades during the swap for added convenience
Protecting Outdoor Structures During Major Home Repairs
Structural repairs are not limited to the interior of a home, and decks, porches, and other outdoor structures can suffer from the same rot, insect damage, and foundation shifting that affects the main house. Moisture is usually the culprit: ledger boards attached to the house without proper flashing trap water against the siding, while support posts set directly in soil or concrete without a barrier wick moisture upward and decay from the inside out. Experienced deck builders can often repair damaged ledger boards, support posts, or joists rather than tearing out an entire deck, especially when the damage is localized. A common approach is “sistering” a new joist alongside a compromised one, transferring the structural load without removing existing decking above it. Posts can sometimes be reinforced with post saver sleeves or partially replaced at the base using a technique called scarfing, which splices in new lumber only where rot has occurred. This selective repair approach keeps usable decking material in place and reduces the volume of lumber waste. On a typical 300-square-foot deck, replacing just the affected framing members instead of the entire structure can save several hundred pounds of treated lumber from landfill disposal. It also preserves decking boards that may be difficult to match if the deck is several years old and the original material is no longer manufactured in the same profile or color. Before committing to a full teardown, homeowners should ask their contractor to inspect the substructure piece by piece rather than assuming widespread failure. In many cases, only 15-20% of the framing shows genuine structural compromise, with the remainder still sound enough to support decades of continued use.
If a full rebuild becomes necessary, ask your contractor about relocating your belongings before construction begins. Protecting furniture, planters, grills, and stored items from debris and dust simplifies cleanup afterward and prevents dust and moisture from settling into fabric or wood surfaces during multi-day projects. Some homeowners bring in a moving company temporarily to store outdoor furniture, patio sets, and equipment during larger repair jobs. This is especially worth considering for projects lasting more than a few days, since extended exposure to construction dust, falling debris, or shifting equipment significantly raises the odds of damage. A short-term storage unit or pod placed elsewhere on the property can also work if a full moving service feels unnecessary. Clearing the work area doesn’t just protect your belongings — it also helps contractors move faster and more safely. Fewer obstacles mean less time spent navigating around furniture, fewer accidental scuffs or breaks, and a lower chance that something you’d otherwise need to replace gets damaged. In many cases, the modest cost of temporary storage is far less than the cost of repairing or replacing items ruined during construction.
- Inspect ledger board connections for rot before assuming a full rebuild is needed — a screwdriver poke test reveals soft spots that a full tear-off would needlessly send to the landfill
- Ask whether structural posts can be reinforced rather than replaced, since sistering a new post alongside a compromised one often restores stability at a fraction of the material cost
- Clear furniture and stored items before major construction begins, and set aside anything reusable so it doesn’t get tossed out with actual debris
- Cover nearby plants, decks, and fencing with tarps to prevent dust, debris, or falling materials from causing damage that creates additional repair waste later
- Request a plan for lumber disposal or recycling after the project, including whether usable offcuts can be donated to salvage yards or community rebuild programs
- Confirm which materials qualify for local recycling before demolition starts, since treated lumber, metal fasteners, and composite decking often require separate handling
Structural repairs do not have to be synonymous with dumpsters full of discarded materials. By diagnosing problems accurately, choosing targeted repair methods, and working with contractors who prioritize reuse and recycling, you can restore your home’s safety and value while minimizing waste. Start by getting a thorough inspection of the damaged area, then ask every professional you hire how they plan to handle materials responsibly. Small, informed choices at each step add up to a repair process that is better for your home, your budget, and the environment.