
Every home has materials worth a second look before they head to the landfill — old brick, leftover lumber, salvaged countertops, weathered fencing, even outdated fixtures. Giving these materials new purpose is not only better for your budget, it can also add character to a kitchen or backyard that brand-new products simply cannot replicate. This guide walks through practical ways to repurpose old materials across the most popular renovation zones in a home, while also flagging where professional help makes the project safer and longer lasting. Whether you are planning a full kitchen overhaul or a weekend patio refresh, these ideas will help you make smarter, more sustainable choices.
Reclaimed Wood Cabinetry and Open Shelving

Old barn wood, salvaged flooring, or even pallet lumber can be transformed into cabinet fronts, open shelving, or a statement kitchen island. The natural grain and worn texture bring warmth to a space that all-new materials often lack. Species like oak, pine, and chestnut are common finds and each brings a different look, from tight, refined grain to a rougher, more rustic character. Before installing anything, the wood should be cleaned, treated for pests, and sealed properly so it holds up to kitchen humidity and daily wear. This usually means a thorough scrub to remove dirt and old finishes, followed by kiln-drying or heat treatment to kill off insects and larvae that may be hiding in the grain. Skipping this step risks introducing termites or wood-boring beetles into your home, so it’s worth having the lumber professionally inspected if it’s sourced from an old barn or demolition site. Sealing is just as important as cleanup. A food-safe polyurethane or hardwax oil finish protects against moisture and staining, which matters most near sinks and stovetops. For open shelving that will hold dishes or food items, look for finishes labeled safe for kitchen use, and plan to reapply a protective coat every year or two as the wood is exposed to steam, grease, and temperature swings. Structural considerations matter too. Reclaimed boards can vary in thickness and may have old nail holes, cracks, or warping that need addressing before they’re used as functional cabinetry. Reinforcing shelving brackets and choosing thicker cuts (at least three-quarters of an inch) for weight-bearing pieces will keep the finished result both beautiful and durable.
When homeowners are gathering kitchen design ideas, reclaimed wood is one of the easiest ways to add a custom look without a custom price tag. Salvaged barn boards, old joists, or even dismantled shipping pallets can be milled down into cabinet fronts, floating shelves, or a butcher-block-style island top, often at a fraction of what new specialty lumber costs. Open shelving in particular makes reclaimed wood shine, since the grain, nail holes, and weathered patina become part of the display rather than something to hide behind cabinet doors. A depth of 10 to 12 inches works well for everyday dishware, while brackets or hidden steel supports rated for at least 50 pounds keep the shelves sturdy under stacked plates and cookware. Pairing reclaimed wood with simple hardware or a painted lower cabinet run keeps the look intentional rather than mismatched. Matte black pulls, brass knobs, or even leather straps all read as deliberate choices against the wood’s texture, while a soft white or sage green base cabinet grounds the space so the reclaimed elements stand out as an accent rather than overwhelming the room. It’s worth having any salvaged wood cleaned, kiln-dried, or treated for pests before it goes anywhere near food prep areas, since old barn wood and pallets can harbor mold or insects. A quick sanding and a food-safe sealant or oil finish also make the surfaces easier to wipe down and maintain long-term.
- Sand reclaimed boards to a smooth, splinter-free finish, then seal with food-safe mineral oil or polyurethane before installing near heat sources or sinks
- Choose water-resistant sealers for sink-adjacent shelving and heat-tolerant finishes near stoves to prevent warping or discoloration
- Mix reclaimed wood accents with newer materials, like pairing a salvaged wood island with laminate or painted cabinets, for visual balance
- Use salvaged wood for a floating shelf above a stove or sink, securing it with concealed brackets rated for at least 25-50 lbs
- Check for structural soundness before load-bearing use, inspecting for rot, insect damage, or hairline cracks that weaken fibers
- Test old boards for hidden nails, screws, or metal fragments with a stud finder or magnet before cutting or drilling
- Reinforce thinner reclaimed boards with a hidden plywood backer when using them for dish or cookware storage
Salvaged Countertops and Backsplash Materials

Countertops from a demolished kitchen or a reclamation yard can often be cut down and reused, especially stone slabs like granite or marble that are expensive to replace new. Tile backsplashes are another great candidate, since broken sets or leftover tile from other rooms can be arranged into a patterned mosaic. This approach keeps usable material out of the landfill while giving a kitchen a one-of-a-kind look.
It is worth having a professional check the condition of any salvaged stone before installation, since hairline cracks are not always visible to an untrained eye. A quick inspection can save you from having a beautiful new countertop fail within a year of installation.
Electrical Safety When Reusing Old Fixtures
Vintage light fixtures, pendant lamps, and even old appliances can add charm to a kitchen renovation, but they need to be evaluated for safety before going back into service. Older wiring insulation can degrade over time, and fixtures built decades ago were not designed for modern electrical loads. This is one area where cutting corners is not worth the risk.
Licensed electricians can rewire a vintage fixture so it looks original but meets current safety codes, giving you the best of both worlds. They can also confirm that your kitchen’s circuits can handle the addition of reclaimed or vintage appliances without overloading the system.
- Have any vintage fixture inspected before wiring it into your home
- Replace old plugs and cords rather than reusing frayed originals
- Confirm your panel has capacity before adding reclaimed appliances
- Never assume an old fixture is safe just because it still lights up
Repurposed Brick and Stone for Patios and Walkways

Leftover brick from a torn-down chimney or old stone from a demolished retaining wall can become the foundation of a beautiful patio, walkway, or fire pit surround. These materials are often more durable than new pavers because they have already weathered decades of use. Reusing them also keeps the new hardscaping visually consistent with the rest of an older property.
Laying reclaimed brick or stone correctly requires proper base prep, since uneven or reused materials can shift more than uniform new pavers if the groundwork is not done right. Taking the time to grade and compact the base properly will keep your patio level and stable for years.
- Sort salvaged brick and stone by size and condition before laying out a design
- Use a sand or gravel base for flexibility with irregular material
- Seal porous reclaimed stone to prevent staining and moss growth
- Save odd-shaped pieces for edging or fire pit borders
Fencing Materials Worth Saving and Reusing
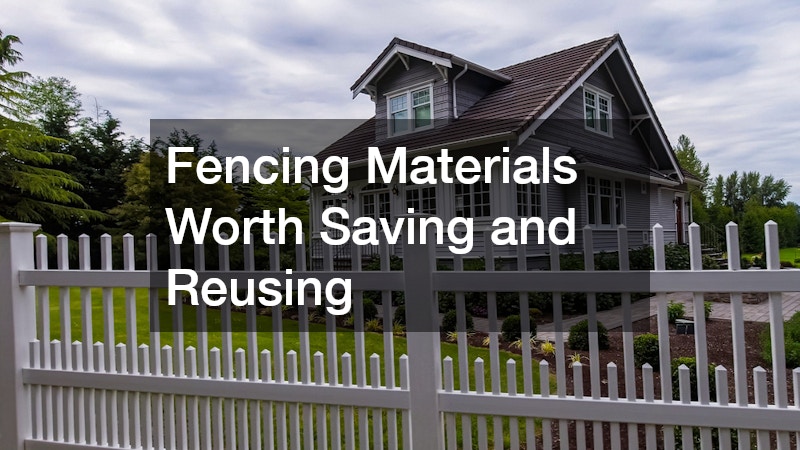
Old fence panels, gates, and posts are not always destined for the dump. Sections in decent shape can be repurposed as garden trellises, raised bed borders, or decorative screening, while sturdier posts can sometimes be reset and reused in a new layout. This is especially useful for anyone trying to stretch a landscaping budget further.
If you are replacing a full fence line, local fence builders can often tell you on-site which sections are worth salvaging and which have deteriorated past the point of safe reuse. This saves you from investing labor into materials that will fail within a season or two.
- Test posts for rot at the base before reusing them
- Repurpose flat panels as privacy screens for trash cans or utility areas
- Use old pickets as raised garden bed slats
- Recycle metal fence hardware rather than replacing it new
Outdoor Living Upgrades Using Existing Structures
An old patio cover, pergola, or even a carport frame can sometimes be adapted rather than torn down completely. Adding retractable awnings to an existing structure is a cost-effective way to extend outdoor living space without a full rebuild. This works especially well when the existing frame is structurally sound but simply outdated in style or function.
Retrofitting an existing structure also tends to be faster than starting from scratch, since the framework and footings are typically already in place. A contractor can evaluate whether the existing supports can handle the added weight and movement of a retractable system before installation begins.
- Inspect existing beams and posts for rot or insect damage first
- Confirm the structure can support motorized or manual awning hardware
- Consider fabric and frame materials that resist local weather patterns
- Combine shade upgrades with lighting for extended evening use
Water Management for Reused Outdoor Materials
Repurposing brick, stone, or wood for patios and garden beds can sometimes change how water moves across a yard, especially if the new layout blocks a natural runoff path. Poor lawn drainage is one of the most common issues homeowners run into after a project like this, since water that used to soak into open soil now hits a hard surface and has nowhere to go. Addressing this early prevents pooling, erosion, and soggy patches near the new install.
Simple solutions like French drains, gravel trenches, or regrading a section of yard can redirect water away from both the new feature and the house foundation. It is far easier to plan for water flow before materials are set in place than to fix it after the fact.
- Watch how water moves across your yard during a heavy rain before building
- Slope reused-material surfaces slightly away from the home
- Add gravel or drain tile beneath patios built in low-lying areas
- Reassess lawn drainage anytime you add a large new surface to the yard
Plumbing Considerations for Reclaimed Fixtures
Vintage sinks, clawfoot tubs, and old outdoor spigots have a certain appeal, but they often use fittings and pipe sizes that do not match modern plumbing standards. Reusing these fixtures usually means adapting connections rather than assuming a direct swap will work. This is especially true for kitchens, where sink placement affects both plumbing and cabinetry layout.
A plumbing service can assess whether a reclaimed fixture is compatible with your home’s existing lines or whether adapters, new valves, or rerouted pipes will be needed. Getting this evaluated before demolition begins prevents costly surprises once the old fixture is already out and the new one does not fit.
- Measure reclaimed fixtures against current plumbing rough-in dimensions
- Budget for adapter fittings when mixing old and new fixtures
- Test reclaimed outdoor spigots for leaks before final installation
- Confirm shutoff valves are accessible after installation
Roofing and Structural Checks Before Major Reuse Projects
Before repurposing large architectural salvage like old barn beams, roofing tin, or structural timber into a kitchen or outdoor build, it is worth having the source structure and the new installation site evaluated. Reclaimed roofing tin, for example, makes a striking accent wall or awning cover, but it needs to be checked for rust-through and sharp edges before use. Roofing services can also advise on whether a covered outdoor kitchen or patio addition needs updated flashing or drainage to protect the reused materials long term.
Any time reclaimed material is being added to or removed from a roofline, it is worth having the structural impact reviewed. Small changes in weight distribution or water flow can create bigger problems over time if left unaddressed.
- Inspect reclaimed roofing material for rust, rot, or sharp edges
- Confirm flashing and drainage are updated around new outdoor structures
- Check weight load before adding heavy reclaimed materials to a roofline
- Address any leaks at the source before reusing affected materials nearby
Foundation and Structural Stability for Larger Renovation Plans
Anyone combining multiple reuse projects into one larger renovation, such as an extended kitchen with an attached outdoor living area, should confirm the home’s structural foundation can support the changes. Settling, cracking, or moisture issues around a foundation can worsen when new additions change the home’s weight distribution or alter how water moves around the property. Catching these issues early keeps the rest of the renovation from being built on an unstable base.
If a home inspection turns up cracks, uneven floors, or doors that no longer close properly, foundation repair should be addressed before any cosmetic reuse projects move forward. A custom home builder experienced in renovations can help sequence the work so structural repairs happen first, followed by the kitchen and outdoor upgrades that bring the reclaimed materials to life.
- Watch for cracks in walls, floors, or foundation exteriors
- Address grading and downspout issues that direct water toward the foundation
- Have uneven floors or sticking doors evaluated before renovating
- Sequence structural repairs before cosmetic material reuse
Reusing old materials is one of the most rewarding ways to renovate, blending character, sustainability, and savings into a single project. The key is knowing which materials are worth saving, which need professional evaluation, and how each choice affects the systems already at work in your home. Start with a walkthrough of your kitchen and yard to identify what can be salvaged, then bring in the right professionals for the pieces that involve wiring, plumbing, structure, or drainage. With the right planning, your next renovation can honor the past while building something built to last.