
Every winter and summer, homeowners across the country watch their utility bills climb without understanding why. The truth is that most homes leak energy through dozens of small, often invisible gaps, outdated materials, and aging equipment that nobody thinks to check. Finding these hidden culprits is the first step toward a more comfortable home and a lower monthly bill. This guide walks through the most common places energy slips away and what you can do about each one.
Attic Insulation and Roof Ventilation Gaps
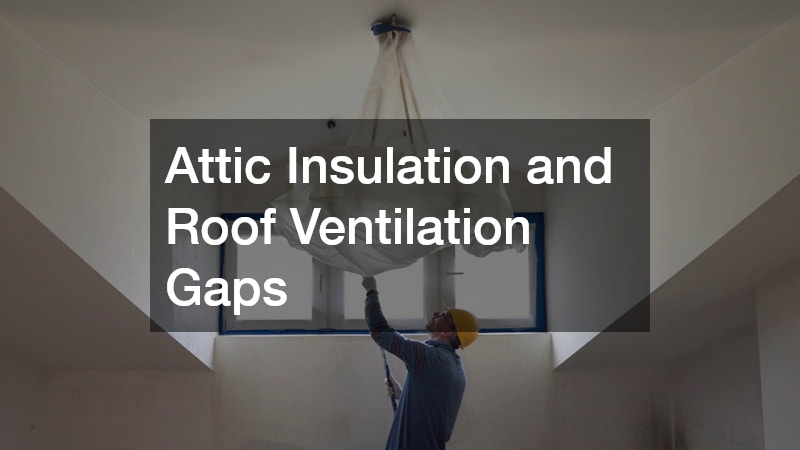
Heat rises, and if your attic insulation is thin, compressed, or unevenly distributed, warm air escapes straight through your ceiling in winter while summer heat pours back down into living spaces. The Department of Energy recommends attic insulation levels of R-38 to R-60 for most climates, yet many homes built before 2000 still have only R-19 or less. Many older homes were insulated to standards that no longer meet modern energy codes, leaving a noticeable gap in performance that shows up as higher utility bills year-round. A simple visual check during a seasonal roof inspection can reveal whether insulation has settled or shifted away from the eaves. Look for bare patches, matted-down fiberglass batts, or insulation that’s visibly thinner near the roof edges, since this is where coverage tends to erode first and where heat loss is most severe. Roof ventilation problems often compound insulation issues rather than existing separately from them. Blocked soffit vents, damaged ridge vents, or insulation that’s been stuffed too tightly against the roof deck can trap moisture and heat in the attic, leading to ice dams in winter and premature shingle aging in summer. A balanced system needs roughly equal intake and exhaust airflow, so a homeowner adding insulation without checking vent clearance can accidentally create a bigger problem than the one they solved.
While you are up there, it is worth having a roofer examine flashing, vents, and the underlayment, since damaged roofing materials often let conditioned air escape through the attic space just as easily as gaps in insulation do. A qualified roofer can also check attic baffles, which keep insulation from blocking airflow at the eaves, and confirm that the ratio of intake to exhaust ventilation meets the roughly 1:300 rule most building codes recommend. Ice dams, curling shingles, and blocked soffit vents are all signs that your roof system is contributing to energy loss rather than preventing it. Ice dams in particular form when warm attic air melts snow on the roof, which then refreezes at the colder eaves, and this cycle can force water beneath shingles and into your living space. Discolored ceiling patches, sagging roof decking, or a musty smell in the attic are additional red flags worth mentioning to your roofer, since they often point to trapped moisture from poor ventilation rather than a leak alone. Left unaddressed, this trapped moisture can rot decking, degrade insulation’s R-value, and shorten the lifespan of shingles by years. Simple fixes like adding ridge vents, clearing debris from soffit intakes, or sealing gaps around bathroom and kitchen exhaust ducts that vent into the attic can meaningfully reduce both energy loss and moisture-related damage.
- Look for daylight peeking through the attic boards near the roofline, especially around chimneys, vent pipes, and where the roof meets exterior walls
- Check for matted or discolored insulation, which signals moisture intrusion; also look for a musty smell or dark staining on rafters
- Confirm insulation depth meets recommended R-values (typically R-38 to R-60 in most climates, or roughly 12-16 inches of blown-in fiberglass or cellulose)
- Note any ice dam formation along the eaves in winter months, since these thick ridges of ice often point to escaping heat melting snow unevenly on the roof
- Watch for icicles hanging directly below the attic overhang, another sign that warm air is reaching the roof deck
- Ask about ridge and soffit vent balance during your next roof checkup, since blocked soffit vents from insulation or debris can trap heat and moisture even with a functioning ridge vent
- Request a calculation of your attic’s net free ventilation area to confirm it meets the standard 1:150 or 1:300 ratio of vent space to attic floor area
Foundation Cracks and Basement Wall Seepage
Concrete foundations naturally develop hairline cracks over time as a house settles, and while small cracks may seem cosmetic, they often allow drafts, moisture, and even pests to enter the lowest level of your home. This constant infiltration forces your heating and cooling system to work harder to maintain a stable indoor temperature. A yearly walk-through of your basement or crawlspace perimeter can catch these issues before they widen.
For larger structural cracks, gaps around utility penetrations, or uneven slab settling, it is worth calling concrete companies to evaluate whether the damage is purely cosmetic or a sign of deeper foundation movement. Sealing these areas properly not only stops energy loss but also protects the structural integrity of the home for years to come.
- Hairline cracks under an eighth of an inch are usually not urgent but should be sealed
- Cracks wider than a quarter inch may indicate settling that needs professional review
- Gaps around pipes or electrical conduits are common overlooked leak points
- Efflorescence, or white chalky residue, signals water intrusion through concrete
Exterior Wall Cladding and Stucco Cracking

The exterior skin of your home does more than provide curb appeal; it is a critical barrier against wind-driven air infiltration. Stucco, in particular, can develop spider cracks as a house shifts seasonally, and these cracks allow both moisture and air to penetrate the wall assembly behind the finish. Left unaddressed, this can lead to hidden water damage inside wall cavities that also undermines insulation performance.
Experienced stucco contractors can identify whether cracking is superficial or a sign of a failed weather barrier underneath, and they can recolor or patch sections so repairs blend seamlessly with the rest of the wall. Catching these issues early is far less expensive than dealing with rot or mold remediation later.
- Map cracks after a temperature swing to see which ones are active versus stable
- Check around window and door trim, common weak points in stucco systems
- Watch for staining below cracks, which suggests water is already tracking through
- Schedule a professional review every few years even if no visible damage is present
Window and Door Seals Around the Perimeter

Windows and doors are among the most obvious sources of drafts, yet many homeowners only notice the problem once a room feels noticeably colder than the rest of the house. Weatherstripping compresses and cracks over time, and old caulk around window frames shrinks, leaving thin gaps that let outside air pour in. A lit candle or incense stick held near the frame on a windy day can quickly reveal where air is moving.
Beyond weatherstripping, single-pane or poorly glazed windows lose energy constantly regardless of how well they are sealed, so replacement may be worth considering in rooms with the highest heating or cooling demand. Prioritizing the leakiest windows first offers the best return before tackling every window in the house.
- Test each window and door for a visible gap when closed and latched
- Replace foam or rubber weatherstripping that feels brittle or compressed
- Recaulk exterior trim every five to seven years as a preventive measure
- Consider storm doors on frequently used entry points to add another air barrier
Ductwork Leaks and Airflow Losses
Ducts hidden inside walls, attics, and crawlspaces are notorious for leaking conditioned air before it ever reaches your living space. Studies consistently show that a significant percentage of heated or cooled air escapes through duct seams, loose connections, or damaged sections long before it exits a register. If certain rooms never seem to reach a comfortable temperature, leaky ductwork is often the hidden reason.
A qualified technician performing furnace repair can also assess duct connections while diagnosing airflow or performance issues, since a struggling furnace is sometimes compensating for losses happening further down the line. Sealing and insulating exposed ductwork in unconditioned spaces is one of the most cost-effective upgrades a homeowner can make.
- Feel around duct joints in the attic or basement for air movement on a running system
- Look for disconnected flex duct sections, especially near vents and registers
- Check for crushed or kinked ducts that restrict airflow
- Have duct leakage tested if certain rooms are consistently too hot or too cold
Aging Heating and Cooling Equipment Performance

An aging furnace or air conditioner does not just risk breaking down; it also quietly loses efficiency year after year, consuming more energy to produce the same level of comfort. Components like heat exchangers, blower motors, and refrigerant lines degrade gradually, and many homeowners do not realize how much extra energy an old system uses until they compare utility bills after an upgrade. Annual maintenance can extend a system’s life, but there comes a point where repair costs outweigh the benefit.
For homes without existing ductwork, or for those looking to condition specific rooms without overworking a central system, ductless mini split heat pump installation offers a highly efficient alternative that targets individual zones. This approach reduces energy waste by heating or cooling only the spaces actually in use rather than conditioning an entire home uniformly.
- Systems older than fifteen years typically operate well below current efficiency standards
- Strange noises, uneven heating, or frequent cycling are signs of declining performance
- Zoned systems can cut energy use in rooms that are rarely occupied
- Regular filter changes and coil cleaning preserve efficiency between major services
Kitchen Appliance Placement and Ventilation Design
The kitchen is one of the most energy-intensive rooms in the home, and poor layout decisions can quietly increase both heating and cooling loads. Refrigerators placed too close to ovens or direct sunlight work harder to maintain internal temperature, while poorly vented range hoods can pull conditioned air outside faster than necessary. Thoughtful layout planning addresses these inefficiencies before they become permanent parts of the home.
Working with a kitchen designer during a remodel allows homeowners to position major appliances, ventilation, and lighting in ways that reduce unnecessary energy use while improving daily functionality. Small adjustments made during the planning stage, such as choosing energy-rated appliances and properly sized exhaust systems, pay off in lower bills for years afterward.
- Keep refrigerators away from ovens, dishwashers, and direct sun exposure
- Choose range hoods sized correctly for the stove to avoid excessive air loss
- Consider natural light placement to reduce reliance on artificial lighting
- Select energy-rated appliances when planning a kitchen renovation
Garage Door Seals and Attached Garage Insulation
An attached garage is often one of the least insulated parts of a home, yet it shares walls and sometimes ceiling space directly with living areas. Gaps around an old or warped garage door let outside air flow freely into this space, which then transfers through shared walls into bedrooms or living rooms above or beside it. This is especially noticeable in homes with a bonus room built over the garage.
A garage door contractor can replace worn bottom seals, weatherstripping, and even the door panels themselves to dramatically cut down on this type of air infiltration. Insulated garage door models also help stabilize temperatures inside the garage, reducing the strain on adjacent living spaces.
- Check the bottom seal for gaps by looking for daylight around the closed door
- Inspect side and top weatherstripping for cracking or separation
- Consider an insulated door if the garage sits below a living space
- Weatherstrip the door connecting the garage to the house interior as well
Yard Grading, Fencing, and Outdoor Airflow Patterns
What happens outside your home directly affects indoor energy use, particularly when it comes to wind exposure and shade coverage. Poor yard grading can direct water toward the foundation, increasing moisture problems that worsen insulation performance indoors. Thoughtful landscaping, including strategically placed trees and shrubs, can block prevailing winds in winter and provide shade that reduces cooling demand in summer.
Fencing also plays a role in shaping airflow around a house, and an aluminum fence company can install privacy or wind-blocking sections that reduce how much cold air reaches exterior walls and windows during storms. While fencing alone will not solve an energy problem, it contributes to a broader strategy of managing the microclimate immediately surrounding your home.
- Grade soil away from the foundation at a gentle slope to prevent water pooling
- Plant deciduous trees on the south side for summer shade and winter sun
- Use evergreen plantings or fencing on the north side to block winter wind
- Avoid dense shrubbery directly against walls, which traps moisture
Flooring Transitions and Subfloor Air Gaps
Flooring is rarely the first place homeowners look for energy loss, yet gaps between subfloors, transition strips, and exterior-facing tile can allow drafts to travel upward from crawlspaces or unheated areas. This is especially common in entryways, sunrooms, and bathrooms where tile sits over uninsulated subfloor sections. Cold floors are not just an inconvenience; they indicate a real thermal weak point in the home’s envelope.
A tile shop can advise on proper underlayment and insulation board options when floors are being replaced, ensuring the new installation actually improves comfort rather than repeating the same energy losses. Radiant heating options installed beneath new tile can further offset the natural coolness of stone and ceramic surfaces in colder months.
- Feel for drafts near baseboards in rooms with tile or stone flooring
- Ask about insulated underlayment when planning a flooring replacement
- Consider radiant floor heating in bathrooms or entryways during a renovation
- Seal gaps where flooring meets exterior door thresholds
Hidden energy leaks rarely announce themselves with an obvious sign; instead, they show up gradually as higher bills, uneven comfort, and rooms that never quite feel right. Working through your home systematically, from the attic down to the subfloor, gives you a clear picture of where your money is actually going. Start with the areas most likely to affect daily comfort, tackle the simplest fixes first, and bring in trusted professionals for the issues that require a trained eye. A little attention now can translate into meaningful savings and a noticeably more comfortable home throughout every season.