
Every winter and summer, small gaps and cracks in your home quietly drain money from your wallet, one degree at a time. Air leaks around windows, doors, attics, and hidden ductwork force your heating and cooling systems to work overtime, and the effect shows up as a frustrating line item on your monthly utility bill. The good news is that most of these leaks are findable and fixable without a major renovation. This guide walks through the most common culprits, room by room and system by system, so you can plug the gaps that are costing you the most.

Inspect Attic Insulation and Roof Ventilation
Heat rises, and if your attic is poorly insulated or improperly vented, conditioned air escapes through the top of your house faster than almost anywhere else. A thin, patchy, or compressed layer of insulation lets warm air slip out in winter and lets scorching heat seep in during summer, forcing your system to compensate constantly. Homeowners often overlook the attic simply because it is out of sight, but a quick visual check twice a year can reveal gaps around vents, chimneys, and attic hatches.
While you are up there, look closely at the condition of your roofline from both inside and outside the house. Cracked flashing, missing shingles, or worn underlayment can let outside air and moisture into the attic space, undermining even the best insulation. If you notice daylight coming through boards or soft, damp spots near the roofline, it may be time to call a roofer for a professional inspection before small gaps turn into bigger structural problems.
- Check for compressed or missing insulation near attic edges
- Look for gaps around recessed lighting and exhaust fans
- Inspect flashing around chimneys and roof penetrations
- Confirm attic vents are not blocked by insulation
- Schedule a seasonal roof check before extreme weather hits
Seal Gaps Around Windows and Exterior Doors
Windows and doors are the most obvious sources of drafts, and they are usually the easiest to fix yourself. Over time, caulk dries out and weatherstripping compresses, creating thin channels where outside air sneaks in year-round. A simple test is to hold a lit candle or a piece of tissue paper near the frame on a windy day; if it flutters or flickers, you have found a leak.
Replacing weatherstripping and adding fresh caulk around window and door frames is inexpensive and can noticeably reduce strain on your air conditioning system during hot months. Homeowners who invest a weekend in resealing every window and exterior door often see a measurable drop in their next utility bill. Pay special attention to older homes, where original frames may have shifted slightly over decades of settling.
- Replace cracked or flattened weatherstripping annually
- Use silicone caulk for exterior frames exposed to weather
- Add door sweeps to block drafts under exterior doors
- Check sliding doors and patio door tracks for gaps
- Test with a candle flame or tissue paper on a breezy day
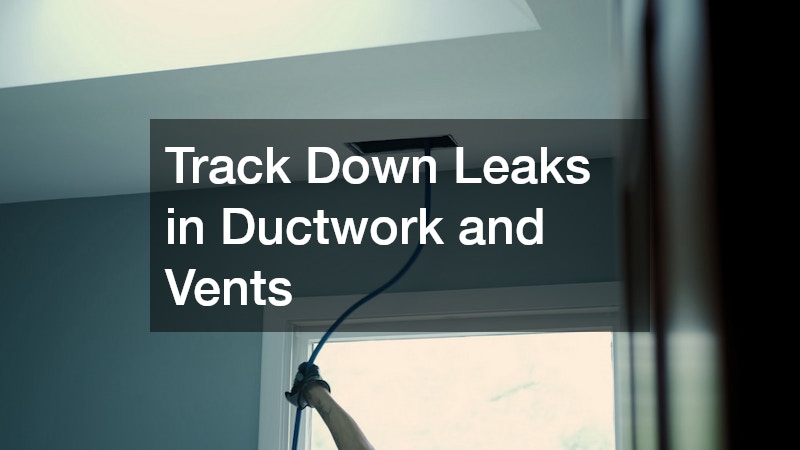
Track Down Leaks in Ductwork and Vents
Ductwork hidden behind walls, in crawl spaces, or above ceilings can leak conditioned air before it ever reaches your living space, which means you are paying to heat or cool air that never actually warms or cools your home. Studies suggest that a significant percentage of air moving through a typical duct system escapes through loose joints, disconnected sections, or simple wear and tear. This is one of the least visible but most costly sources of energy waste in an average household.
If certain rooms always feel too warm or too cold compared to others, or if you notice a spike in usage without a clear cause, your ductwork is worth investigating. Sealing duct joints with mastic sealant or metal tape, rather than standard duct tape, provides a longer-lasting fix. For homes with extensive duct damage, a professional assessment can determine whether repair or replacement makes more financial sense in the long run.
- Feel for air escaping near duct joints and connections
- Check flexible ducts for kinks, tears, or disconnections
- Seal accessible joints with mastic sealant or foil tape
- Insulate ducts running through unconditioned spaces
- Have a professional test airflow if rooms heat unevenly
Watch for Hidden Water and Plumbing Leaks
Air leaks are not the only silent budget drain in a home; hidden water leaks can be just as expensive and much more damaging if left unaddressed. A slab leak, where a pipe beneath your home’s concrete foundation develops a crack or corrosion, can waste thousands of gallons of water while quietly raising your utility bill each month. Because these leaks are hidden beneath flooring, they often go unnoticed until warped floors, unexplained damp spots, or mold odors appear.
Professional slab leak detection uses specialized listening equipment and thermal imaging to pinpoint the exact location of a leak without tearing up your entire floor. Catching this early not only saves water and money but also protects your foundation from long-term structural damage. If your water bill jumps unexpectedly with no clear explanation, this is one of the first things worth ruling out.
- Watch for unexplained increases in your water bill
- Look for warm spots on flooring, which can indicate hot water line leaks
- Notice any musty odors or unexplained dampness indoors
- Schedule detection service before damage spreads to the foundation
Keep Drains and Pipes Running Efficiently
While not directly tied to air leaks, inefficient plumbing habits often compound household costs in similar ways, draining money slowly and invisibly each month. Slow drains caused by grease, hair, and mineral buildup force fixtures to work harder and can lead to costly clogs or backups over time. Relying too heavily on harsh chemical drain cleaners can also damage older pipes, creating leaks that add to your water bill.
A better long-term approach is routine maintenance paired with occasional professional cleaning for stubborn buildup. Simple habits, like using drain strainers and flushing pipes with hot water weekly, prevent the kind of buildup that leads to expensive repairs. Being proactive here saves money in two ways: lower water waste and fewer emergency plumbing calls.
- Use drain strainers to catch hair and debris
- Flush pipes with hot water weekly to prevent buildup
- Avoid pouring grease or oil down kitchen drains
- Limit harsh chemical treatments that can corrode older pipes
Evaluate Kitchen and Bathroom Surfaces for Gaps
Countertops and backsplashes are another overlooked source of small gaps that let air and moisture seep into cabinetry and walls. Poorly sealed seams around sinks, faucets, and backsplashes can allow drafts and humidity to affect nearby rooms, especially in older kitchens and bathrooms. This is particularly common after a stone countertop installation that was not properly caulked along the edges where it meets the wall or cabinetry.
Checking these seams periodically and resealing them with a flexible, waterproof caulk prevents both energy loss and water damage underneath the counter. If you are renovating, ask your installer specifically about sealing techniques for the material you choose, since granite, quartz, and marble each respond differently to sealants. A well-sealed countertop looks better, lasts longer, and keeps your home more energy efficient.
- Inspect seams where countertops meet backsplashes and walls
- Reseal gaps with flexible, waterproof caulk
- Ask installers about material-specific sealing recommendations
- Check under-sink cabinetry for drafts or moisture

Prepare Outdoor Living Spaces for Temperature Control
Outdoor additions like patios and sunrooms can either help or hurt your home’s overall energy efficiency, depending on how well they are sealed from the main structure. A screen patio that connects directly to climate-controlled indoor space needs proper weatherstripping and transition sealing where it meets the house, or it can become a channel for drafts. Homeowners often forget to treat this transition zone the same way they treat a standard exterior wall.
If you use your patio as an extension of your living space for much of the year, consider upgrading screens, adding door sweeps, and sealing gaps where framing meets the house. This keeps conditioned air where it belongs and prevents outdoor humidity or cold air from creeping indoors. A properly sealed transition also protects wood framing from moisture damage over time.
- Seal the transition point where patio framing meets the house
- Add weatherstripping to screen doors and sliding panels
- Inspect screening material for tears that let in drafts and pests
- Check framing regularly for moisture buildup
Plan for Energy Efficiency During New Construction or Renovation
If you are building a new home or planning a major renovation, energy efficiency should be part of the conversation from day one, not an afterthought. Retrofitting air sealing after the fact is far more expensive and less effective than getting it right during construction, when walls, attics, and foundations are still open and accessible. Working with custom home builders who prioritize tight building envelopes, quality insulation, and modern window technology can save you significant money for decades to come. Look for builders who perform blower door testing before drywall goes up, since this test measures how much air leaks through the structure and identifies weak points while they’re still easy to fix.
A well-sealed new home should achieve a rating of 3 air changes per hour or lower, compared to 7 or more in older, leakier houses. Ask specifically about air sealing techniques, insulation ratings, and window efficiency standards during the planning phase. For insulation, request specifics on R-values for your climate zone: attics typically need R-38 to R-60, while walls generally call for R-13 to R-21. For windows, ask about U-factor and solar heat gain coefficient ratings, and consider double- or triple-pane options with low-E coatings if you live in an area with extreme temperatures.
Don’t overlook smaller details that add up, such as sealed electrical outlets, properly flashed windows and doors, and continuous vapor barriers. Bringing these questions to custom home builders early ensures the finished home performs efficiently from the very first winter, rather than requiring costly corrections later.

A landscape designer can also play a surprising role in home energy efficiency by strategically placing trees and shrubs to block wind and provide shade. Evergreens planted on the north or northwest side of a home create a windbreak that reduces heat loss during winter, while deciduous trees on the south and west sides offer summer shade and then drop their leaves to let sunlight warm the house in colder months. Even the placement of shrubs near a foundation can reduce drafts by blocking cold air from reaching exterior walls and windows.
Thoughtful landscaping reduces the workload on heating and cooling systems throughout the year, complementing the work done inside the home. Studies suggest well-placed shade trees can lower air conditioning costs by 15 to 35 percent, while windbreaks can cut winter heating bills by up to 25 percent in exposed areas. A landscape designer familiar with local climate patterns can also recommend species that mature at the right height and canopy width for your specific roofline and window placement. Combining smart construction choices with smart landscaping creates a home that costs less to run in every season.
When builders coordinate with a landscape designer early in the planning process, they can orient the structure itself to take advantage of natural shade and airflow before a single tree is planted. This kind of integrated approach pays dividends for decades, long after the initial investment in design and planting has been recovered through lower utility bills.
- Ask contractors about air sealing and insulation standards, and request materials meeting at least Energy Star or local code-plus levels
- Choose energy efficient windows and doors from the start, looking for low U-factor and low solar heat gain coefficient (SHGC) ratings suited to your climate
- Use landscaping to provide natural shade and windbreaks, such as deciduous trees on the south/west sides and evergreen rows to block prevailing winter winds
- Request blower door testing to verify a tight building envelope, aiming for a result under 3 air changes per hour (ACH50) for new builds
- Consider continuous exterior insulation (like rigid foam) to reduce thermal bridging at studs and joists
- Seal penetrations for plumbing, wiring, and HVAC ducts during rough-in, before drywall makes access difficult
Address Garage and Attached Structure Leaks
Attached garages are notorious for letting outside air seep into the rest of the home, especially through gaps around the garage door and its mechanical components. A poorly sealed garage door lets in drafts, dust, and moisture, and if the door does not close properly due to a broken spring, that gap can remain open longer than expected while waiting for repairs. Scheduling a broken garage door spring repair as soon as you notice the issue can prevent that gap from lingering and driving up your utility bill. This is a safety issue as much as an efficiency one, since a malfunctioning spring can make the door difficult to operate safely.
Beyond the door itself, check weatherstripping along the bottom seal and sides of the garage door frame, since worn seals are a common and inexpensive fix. If your garage shares a wall with living space, make sure that wall is properly insulated, as it often gets overlooked during initial construction. Keeping this space sealed protects both your utility bill and anything stored inside from temperature swings.
- Replace worn weatherstripping along garage door edges
- Address spring or mechanical issues promptly for safety and sealing
- Insulate shared walls between the garage and living space
- Check for gaps around service doors leading into the garage
Time Home Projects Around Seasonal Moves and Upgrades
If you are relocating to a new home, it is worth having an energy efficiency inspection done before you settle in, since previous owners may not have addressed air leaks at all. Scheduling this inspection around the time you book a moving company can help you tackle sealing projects before furniture and boxes make access to attics, crawl spaces, and windows more difficult. Doing this early also gives you leverage to negotiate repairs or credits if major leaks are discovered during a home inspection.
For those staying put, seasonal transitions are a natural reminder to check on air sealing throughout the house, since spring and fall are ideal times for exterior repairs before extreme temperatures arrive. Setting a recurring reminder twice a year keeps small leaks from turning into expensive habits. A little planning turns air sealing from a forgotten chore into a routine part of home maintenance.
- Schedule an energy inspection before or right after moving in
- Address air sealing while access to rooms is still easy
- Use spring and fall as natural checkpoints for maintenance
- Negotiate repairs based on inspection findings when buying a home
Closing air leaks is rarely a single project with a clear finish line; it is an ongoing habit of checking, sealing, and maintaining the systems that keep your home comfortable. Start with the areas covered here that feel most relevant to your situation, whether that is the attic, the ductwork, or the garage door, and work through the rest over time. Small, consistent effort in sealing your home pays off every single month on your utility bill. The sooner you start, the sooner those savings begin adding up.